Advanced Lighting Techniques for Interior Renders
Learn how strategic lighting can transform your 3D visualizations and make designs feel warm, inviting, and professional.
Why Lighting Makes All the Difference
Lighting isn’t just a technical element in 3D rendering—it’s the soul of your visualization. The difference between a flat, lifeless render and a stunning, photorealistic one often comes down to how you’ve lit the scene. When you nail the lighting, clients don’t just see the furniture and colors. They feel the warmth of the space, they imagine themselves in it, and they get excited about your design.
In this guide, we’re diving into the techniques that separate good renders from exceptional ones. You’ll learn about light temperature, layering strategies, and the specific placement tricks that make spaces feel inviting. Whether you’re working with 3ds Max, Blender, or V-Ray, these principles apply across all platforms.
The Three-Light Foundation
Most professional renders use a foundation of three lights: key light, fill light, and rim light. Your key light is the hero—it’s typically the brightest and creates the main shadows. In residential interiors, this often mimics natural window light or a prominent pendant fixture.
The fill light softens harsh shadows without eliminating them completely. You don’t want it as bright as the key—aim for about 30-40% of the key light’s intensity. This prevents that overlit, flat appearance. Your rim light (also called accent or back light) separates the subject from the background and adds dimension. It’s typically warm and subtle, sitting around 20-25% of the key light intensity.
Quick Ratio Formula
Key light: 100% intensity | Fill light: 30-40% | Rim light: 20-25% intensity
Temperature and Color Balance
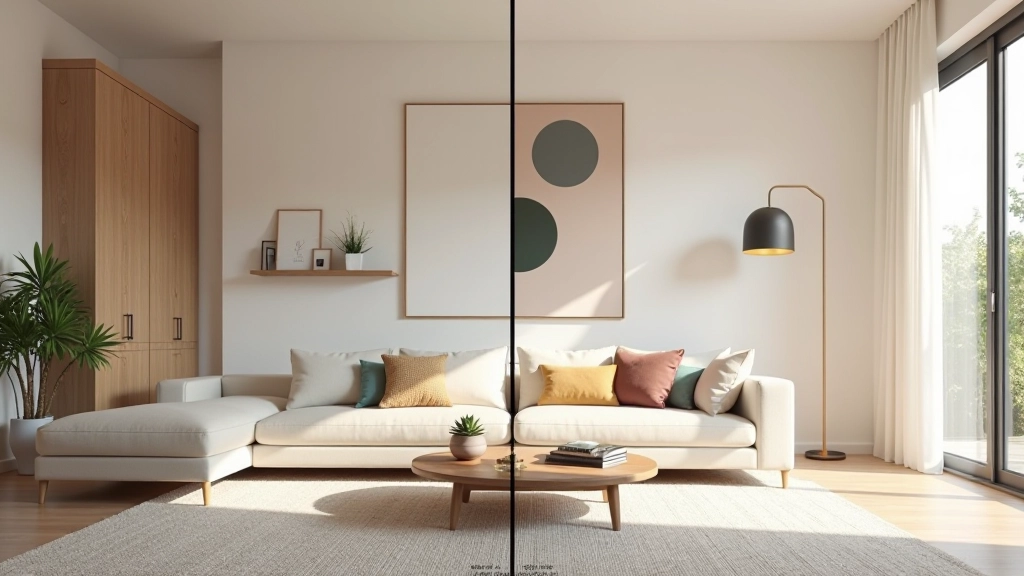
Here’s where most renders lose clients: they ignore color temperature. Daylight isn’t pure white—it varies throughout the day. Morning light (around 6500K) is cooler and bluer. By midday it’s neutral (5500K). Late afternoon and evening warm up significantly, reaching 3000K or lower with tungsten fixtures.
Don’t mix temperatures randomly. If you’re showing a space with natural window light and warm pendant lamps, the contrast actually works. The warm fixtures feel cozier against the cool daylight. But if everything is an ambiguous gray-white, the space feels sterile and uninviting. Your clients won’t want to live there.
Typical interior color temperatures:
- Daylight through windows: 5500-6500K
- LED warm white: 2700-3000K
- Incandescent bulbs: 2700K
- Candles/fireplace: 1900K
Light Shape and Falloff
The shape of your light matters just as much as its intensity. A small, focused light creates hard shadows and drama. A large, diffused light (or multiple bounced light sources) creates soft shadows and feels more natural. In interiors, you’re usually mixing both. A window creates relatively soft light because it’s large. A single pendant lamp creates harder shadows.
Falloff controls how quickly light loses intensity with distance. Real light follows inverse square law—it drops off predictably. But in rendering software, you can adjust this. A light with no falloff feels artificial and flat. Too much falloff and the space behind the light source disappears into darkness. The sweet spot depends on your room size, but most interior renders benefit from realistic, physics-based falloff.
Pro Tip: Layering Soft Light
Don’t rely on one big area light. Instead, use multiple medium-sized lights positioned to bounce off walls and ceilings. This creates more natural, layered illumination that mimics real-world interior lighting.
The Power of Indirect Lighting
Indirect lighting is where magic happens. Instead of pointing light directly at your subject, you bounce it off ceilings, walls, or other surfaces. This mimics how real interiors feel—light spreads through the space naturally, creating soft ambient illumination. Your renders immediately look more sophisticated and livable.
In 3D software, you can achieve this with emissive materials on ceiling panels, hidden area lights above cove details, or simply positioning lights to bounce off large white surfaces. The key is patience—test different placements. Sometimes moving a light 15 centimeters changes everything about how a room feels. You’re not just lighting objects; you’re lighting the entire spatial experience.

Educational Information
This guide presents lighting techniques and best practices based on professional 3D visualization standards. Rendering results depend on your specific software, hardware capabilities, and project requirements. These techniques are educational and should be adapted to your unique design scenarios. Results will vary based on individual skill level and creative choices.
Master Your Light, Master Your Renders
Lighting separates amateur visualizations from professional ones. You’ve now got the framework: the three-light foundation, temperature awareness, falloff control, and indirect lighting strategies. The real learning happens when you apply these in your own projects. Start simple with basic three-point lighting, then experiment with color temperature mixing. Add indirect bounced light and notice how the space transforms.
Your clients won’t consciously think about the lighting in your renders. They’ll just feel that the space is beautiful, warm, and inviting. That’s the goal. Practice these techniques on your next project, and you’ll see the difference immediately.
Explore More 3D Visualization Resources
Ready to deepen your skills? Browse our complete collection of 3D visualization guides and techniques.
View All Resources